Well, this post has been a long time coming. If anyone out there has been waiting for my Part 3 recap of the Smekens literacy conference, I apologize. I meant to get around to synthesizing my thoughts on the strategies discussed below much sooner than this, but I seemed to have suffered from partial *summer brain* during June, July and August. I say partial due to the fact I did find time to read a handful of fabulous professional literacy books over break, including Who's Doing the Work by Burkins and Yaris. Click HERE for my favorite quotes from this book that may change your mindset for teaching reading. :)
Anyway, now that school has once again started up, I've been swamped preparing my new room with flexible seating options, assessing new students and planning my RtI lessons. However, I must say I'm thrilled to be back in school to see all of the smiling faces in the hallway and my classroom. Nonetheless, I've finally made time to collect my thoughts on the literacy conference. I will pre-warn you this post is quite lengthy, but filled with useful tips. If necessary, save the post and read it in the edges of your day, as Donnalyn Miller would say. :)
As I mentioned in an earlier post, I was blasted with so many steadfast suggestions and innovative mini-lessons to better scaffold students, as well as grab and keep their attention, that I decided to break up the content of the literacy conference into three parts. If you'd like to access Parts 1 and 2, click the following links:
Now, onto Part 3: Mini-Lesson Ideas for Reading Strategies. This post offers ideas for Recalling, Retelling & Summarizing (as well as establishing the difference between the three), Determining Main Idea, Visualizing Ideas, Asking Questions, Making Connections and Synthesizing.
STRATEGY 1
Key Ideas & Details: Recall, Retell & Summarize
The order of communicating text information generally goes from recalling, to retelling, to summarizing. Want to know the difference between the three? Recalling is telling details from a text in any sequence. Retelling is an oral activity in which a student explains the main ideas of the text in his/her own words. Summarizing is similar to retelling, however, a student retells only the most important details/ideas in written form.
Students in Kindergarten, First and Second Grades are usually the ones learning the art of recalling and retelling. Students in Third, Fourth and Fifth Grades are usually learning the craft of summarizing text. In order to summarize, students must be able to distinguish important versus unimportant details in a text, which can be tricky for some students.
Just so all primary teachers are aware, there is a HUGE DIFFERENCE difference between recall and retell. Recall can be accomplished with both fiction and nonfiction texts. Once students finish a text, they simply recall any details they can remember. As mentioned above, there is no specific sequence for the details when in recall mode. Teachers should always work first with recall to see if students can remember anything from the text.
The use of an ABC poster during recall is appropriate for students in all grade levels, but especially practical for English Language Learners. Teachers can support students in discussing the text by having them brainstorm anything they can remember, such as character names, vocabulary words, events, etc. Students (or teachers) write each recalled detail on a Post-It note and place the notes on the appropriate squares on the poster. For example, if you read the story A Bad Case of Stripes by David Shannon, you may write Camilla and place it in the C square and lima beans and place it on the L square, since those are details from the story. Make sure to SAVE the Post-It notes for the retelling activity, which is discussed below.


To move from recall to retell, pull off the Post-Its from the ABC poster and have students sort and organize the details in order. This helps students match the sequence or structure of the passage. As a suggestion for nonfiction texts, also have students retell ideas using key vocabulary from the index of the book by saying, "What did you learn? You must use these 2 (3, 4, etc.) words from the index as part of your retell." This forces students to show relationships between words in the text and makes them sound like experts! What kid doesn't want to sound like an expert? If you choose to have students use 2-3 vocabulary words for upper grade kids, it offers the possibility for them to make connections across the text and becomes a summary when written in a logical order.


Other mini-lessons to help students retell text information are Retell the 5Ws~ Who, What, Where, When, Why, the 5-Finger Retell for fictional texts, also known as Fist Facts for informational text, and Somebody-Wanted-But-So(-Then). Below is a resource for the 5Ws. If you click on the image, you can get a copy of your own for both informational and fictional text. I copied and laminated my cards to make them durable. They're so easy to pull out and use with students.
The 5-Finger Retell has been around for a while. It is useful for students when retelling story elements. For the kinesthetic learners, a garden glove decorated with the story elements to support retelling is always a hit. Students love putting on the glove and wiggling their fingers as they retell. My glove was purchased at Home Depot years ago and has held up nicely. Something so simple to make, yet so engaging! However, eventually, students need to move from the kinesthetic, oral retellings into written responses.


I'm sure there are a ton more ideas out there for retelling, but the last one for this post is the Somebody-Wanted-But-So and Somebody-Wanted-But-So-Then. This activity is in the form of a sentence frame that supports summary writing. It allows students to hone in on their summary writing skills, as Kristina Smekens would say. Make sure to reveal multiple examples to students before having them do it independently. One of my favorite SWBST charts is from Hello Literacy, and it's FREE. I use it often throughout the year with my RtI students. I have students place our brainstorming Post-It notes (what would I do without Post-Its?!) below the example on the colorful circles in the white area to help them draft ideas before having them work independently.
The SWBS and SWBST examples below are from the conference.
STRATEGY 2
Key Ideas & Details: Determine Main Idea
Okay, moving on to Determining Main Idea! Have you ever asked a student what the main idea of his/her book is and been given a one word answer, such as "Sharks!"? Well, it's time to explain to students the main idea of a text is A SENTENCE that tells what the text is all about, not A WORD, which is the topic. The main idea is the unique angle or facet of information in a text. Students can write a one-sentence summary to describe the main idea, or identify in one or two words the topic of a text. It's crucial students know the difference between the two.
To reiterate the difference between topic and main idea, *talk numbers* because kids are always asking, "How many sentences do I have to write?" A topic has 1-3 words and is always in the main idea sentence. Make sure students know the main idea is one sentence containing the overall or most important point the author is making about the topic and that details are multiple sentences using text specific words and phrases that comprise the text.
Here's an idea to try with your students. Using a book series, reveal how main idea is different than the topic. Since I work mostly with the younger students, I will use the Junie B. Jones series for my example, which was also a series brought up at the conference. However, you can pick any book series that is appropriate for your students or age group. For instance, explain to students that Junie B. Jones is the topic, and the title to each book is the main idea. For example, Junie B Jones is a Graduation Girl, Junie B. Jones is Not a Crook, Junie B. Jones is (Almost) a Flower Girl, Junie B. Jones Has a Monster Under Her Bed, etc. These texts identify the text's topic and its main idea within the title.
Another mini-lesson idea is to find a picture book and cover up the title. Read the book to the students, then ask, "In one sentence, what is this book all about?" Make sure the book has a main idea title, such as The Relatives Came, Miss Brooks Loves Books and I Don't, or a topic title, such as The Art Lesson. I own and love all three of these books! :)
In regards to older students, it was mentioned at the conference to practice main idea versus topic with movie trailers or newspaper headlines. For example, have students watch the trailer for the movie Martian with Matt Damon. Ask students, What's the main idea? After some discussion, they'd come to the conclusion that the main idea is to bring Matt Damon home. When using newspaper headlines, find newspapers the day AFTER an event. (Other options for online resources are NewsELA and Time for Kids.) Bring in articles of the same topic, such as the Superbowl. Take off headlines and have students match which headline fits best with each article. Don't have them guess. Have students infer by asking them, WHAT do you know? HOW do you know? I made and use a stop sign as a visual to help students. Feel free to download a copy.
As a teacher it's important to ask yourself, "Have I made sure I've done enough to differentiate topic versus main idea for the students?" If students can't tell you the main idea of a small paragraph, then they certainly can't tell you the main idea of a chapter book or extended story. As kids get older, the text MUST get longer. Check out the book The Kid Who Invented the Popsicle. I recently purchased this book and can't wait to try it out with my students this year.
Each chapter is a topic- one word- that is accompanied by a short passage detailing the topic. See the examples below. Try having students read about a topic and then create a single sentence main idea statement.


Last tip for Determining Main Idea: Always teach Fables before teaching Theme. Teachers need to get kids thinking about the moral or lesson of a story first. Students need this background information before they are able to understand theme and main idea. Since theme is always rooted in the characters, it's also important to ask students, What did we learn from this character's actions/choices/experiences to help support the theme of the story? As an example, you may prompt students with: What caused the change? (Students may respond, "The father died.") Why did he change? ("He had to take care of his family.") What can we learn from the character? ("To take responsibility when necessary."). If you're interested, I have a TPT product in my store called Making Inferences About Characters Using Dialogue, Actions, Thoughts and More that nicely accompanies this mini-lesson. It comes in small poster and individual size, as well as in color and black/white for those who want to save on color ink. :)


STRATEGY 3
Craft & Structure: VISUALIZING IDEAS (p.15)
Do you have students who struggle with visualizing ideas from a text when reading? If so, they may need a *trigger object* like these fun sunglasses below. I got them at the Dollar Tree, which means they were only $1.00 per pair!
Kristina Smekens recommends using the cutouts below on each lens to reiterate to students they won't actually SEE anything, but need to IMAGINE details from a text, especially texts with few or no pictures. However, it's best to introduce visualization by making up different scenarios not related to a text, at first. Let students practice visualizing or imagining before trying the strategy using the text. When working with my own kiddos, I make sure to let them know their visualization drawings may look slightly different than their peers because everyone has different schema and that's okay!
After a bit of practice and once you've created the sunglasses as your concrete trigger object, teach the students the secrets of HOW to visualize a text. Explain that the secret lies in noting nouns, verbs, adjectives and adverbs. For example, students draw nouns, adding lines to show movement, and color or size because of what it stated in the text. Further text details may cause students to change their drawings.
For instance, let's say you read a book about a dog and have students draw a dog (without seeing any pictures from the book). Then you add the detail *the big, brown dog*. These details may have caused students to change their visualization from a small, white dog they may have imagined at first. Get it? Here's another example. Maybe you introduce the topic "The Underground Railroad" to your students. You may see students start sketching trains at first. However, when you start reading about the Underground Railroad, hopefully, their visualization drawings get altered.
This strategy is known as Sketch-to-Stretch or Sketch-Noting and supports students in stretching their understanding of a text. Tip: Don't put up examples of your own at first. Kids don't always think if you put up examples...they copy. If kids sketch note images of their own, they take ownership of their notes. That's exactly what teachers want, right?
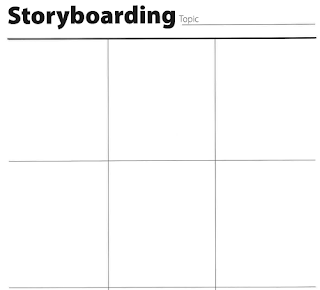
Storyboarding ideas using a graphic organizer is another way to see what kids are thinking. Have students sequence the story in each box to create something similar to a timeline. Teach students, if two things happen at the same time, students need to split the boxes in half. Each box shows a progression of students' thoughts. Remember, a paper-pencil version of storyboarding isn't necessary. You can always use whiteboards, or better yet, if you have access to technology, try apps available for students to sketch their thinking!
Need a mini-lesson idea to support students in visualizing character traits? Try using the books The Way I Feel and The Way I Act. These books can aid in students understanding of how to distinguish character feelings versus traits.
Explain to students character feelings are fleeting or come and go, but traits are tried and true. Practice having students root the traits in evidence to support evidence-based responses.
Furthermore, make sure to treat trait vocabulary just like any other vocabulary by connecting known words to the unknown and by acting out or drawing vocabulary words. It's important to intentionally teach trait vocabulary words by grade level. Unfailingly, start teaching the traits by reviewing the previous grade level's words, then build on. That's what gets the vocabulary to stick with the students.
STRATEGY 4
Craft & Structure: ASK QUESTIONS
Readers who ask questions before, during and after reading are actively engaged and tend to remember necessary details and particulars about a text. Hence, it's crucial we get all students into the habit of asking questions. A way to introduce Asking Questions is by adding a little #tlap to your lessons. If you're unfamiliar with the term #tlap, it stands Teach Like A Pirate, which pretty much means getting creative when planning your lessons to spark engagement. Start the procedure of Asking Questions without a text. Use an image or something even more concrete, like the example below.
Set out a wrapped gift box, but don't say anything about it. As a suggestion, pick a *shirt* box because students, most likely, have preconceived notions about that type of box. See what happens. Knowing how curious kids can be, your students WILL ask about the gift. Without saying a word, start writing their questions down. If students come up with a statement, such as "It's a shirt", change it to a question: "Is it a shirt?"
After a bit of time has passed, open the gift box. Let's say the box contains cookies (MmmMmm, yum). Once students find out the box contains cookies, for example, continue to write down their questions for a few additional minutes. For example, "Who made these?", "What kind are they?", etc. Then, say to the students, Today's text was this present. You had 40 questions about this text. By the time we were done with this present, we answered all of these questions. Once you've practiced with Asking Questions WITHOUT a text, try using these books, Grandpa's Teeth and Train to Somewhere, which bring about great questions!
After identifying questions and writing them down on Post-It notes (before reading), place each question on the answer in the book for *right there* types of questions while reading. Continue to generate questions during reading.
Have you ever heard of Prop Predictions? They are a tried and true motivator to get students to ask questions and make predictions. To plan for Prop Predictions, teachers gather at least 3 props, but no more than 5, that can fit into a bag and nicely accompany a particular book you have in mind for the students. Make sure to show students nothing in the book or even tell them about the title. Only show the props to get students to start questioning. For instance, you may pull out file, wrench and toothbrush as your *hook* to get students questioning. After some discussion, students find out they'll be learning about history of dentistry.
To further explain, here is a primary example. Say to students, "We are reading a text today and it has something to do with an apple, guest restaurant check receipt, and a feathered boa. Any predictions on what we'll be reading about?" Allow students to make predictions and continue to change them based on props shown. After all predictions are made, say "We are reading a Fancy Nancy book today! She is trying to teach her family to eat more healthy at the restaurant. Let's see what happens in the story." Fun stuff, right? If you click on the image below, you'll be able to access a list of elementary, middle, and high school prop examples. :)
STRATEGY 5
Integration of Knowledge & Ideas: MAKE CONNECTIONS
As we all know, schema is important when reading. However, we need to get students to make connections *inside the four corners* of a text to help them understand the author's ideas, not just make *outside of the text* connections.
When students make text-to-world connections, it doesn't necessarily mean connections only to current events. It encompasses worldly knowledge, as well. Students get a ton of their *worldly knowledge* from TV and movies, and some of their knowledge is very inaccurate. They learn new (possibly more useful or true) knowledge when they are involved in reading. When talking about connections, it's important to know, connecting a written text (book, magazine, article, etc.) to a visual (image, video clips, movie, etc.) is considered a multimodal text comparison, but is still text-to-text connections. (Interested in more information on multimodal texts? Check out a previous post I've written HERE.)
Want quick strategies or mini-lessons for text-to-text connections? Try this: Any book you know the students read the previous year that has a movie version, reread an excerpt of the book and then play an excerpt of the movie...not the whole movie. Make sure the excerpts have differences, so students can still make connections between the two, but also discover differences. For instance, compare and contrast the book Lon Po Po to the movie Little Red Riding Hood or the book Rough-Faced Girl to the movie Cinderella. Ask students, "Did the movie director or movie stay true to the text?"
Besides the fact watching the full movie version of a book is a waste of precious class learning time, think about how students act when they hear, "We'll be watching a movie today." They instantly start shouting, "Yay, we're watching a movie! Where's the popcorn?" Students have no intention on taking notes, citing evidence or making inferences when they hear *movie*. Kristina Smekens mentioned,
"While most of us may be guilty of showing students an entire movie version after we've finished a book, let's consider a more powerful option for using {a} multi-modal text. Instead, provide students the same opportunity to make text-to-text comparisons by revealing movie clips while reading the original text."
Teachers must clarify expectations for video clips being multimodal texts. This is what students see on a standardized assessments...video clips, not full-length feature films! Click the image below or the link to access a copy of book and video clip suggestions for elementary through high school levels.
Kristina Smekens also commented on how she'd like to "BURN Venn Diagrams!" This made me laugh, but I also see her point. She claims it is too difficult for students to use. When comparing in a Venn Diagram, there is no connection, organization or parallel events. Students usually fill in random facts.
What should you use instead? T-Charts are recommended, but the secret is to GIVE students the categories or features of comparisons. For example, students can compare characters, settings, perspectives, etc. when comparing texts. Have students brainstorm the same category for text A and text B.
STRATEGY 6
Integration of Knowledge & Ideas: SYNTHESIZE
To achieve synthesis, a person combines what he/she knows (or thought he/she knew) to recently developed knowledge. This is known as the *Ah-ha! Moment*, which gives a person a better understanding of something. He/She can see the bigger picture of a topic or the significance of something. Synthesis can not be forced. It just happens for some kids. Sometimes it causes a change in what they think or makes them think differently.
The example given at the conference focused on a contestant on American's Got Talent. Remember Susan Boyle?
It seemed as if everyone's face in the crowd brought in preconceived notions or predictions of what she could offer to the show. They doubted her talent because of her looks. However, when Susan Boyle began to sing magnificently, it brought synthesis. It changed what everyone in the audience thought about her. This is synthesis. Way to go, Susan Boyle!
Synthesizing is a higher-order thinking skill and requires explicit direction and modeling for students to be successful. For students to synthesize ideas, it's recommended teachers model how to facilitate text-based conversations, to collect textual evidence from multiple texts and to support arguments with textual evidence.
Facilitating Text-Based Conversations:
To assist students in facilitating text-based conversations, try the Fishbowl Strategy. According to Smekens,
"The fishbowl conversation allows all students to be privy to the same conversation but encourages the intimacy of small-group conversations. When utilized in conjunction with reading, it provides a great opportunity for students to share their thinking.
When students share their thinking and are truly engaged in meaningful conversations with peers, it can lead students to synthesize their new learning.
Collecting Textual Evidence from Multiple Texts:
In regards to collecting textual evidence from multiple texts, the goal is to gradually scaffold students up towards more complex texts. Design lessons to assist students in explaining how authors use reasons and evidence to support their points. Make sure to use evidence from two separate texts on the same topic, and remember to break out the multimodal texts!
Smekens recommends teaching students to read multiple texts using the organizer below for support. Titles on similar topics are documented in the center column. She states, "Based on the differing perspectives, students can then cite specific textual evidence from each article on the left (Perspective A) and right (Perspective B) columns."
Support Arguments with Textual Evidence:
To get students to support their arguments with textual evidence, try using a simple formula that ensures all the necessary elements are included, such as *Yes, MA'AM*. I purchased the poster below at a previous Smekens Conference last year. Click the link above to purchase your own poster.
The mini posters below can be held up during classroom discussions to prompt students to back up their constructed responses. Another option (shown at the conference) is to create large prompts for students to refer to when constructing their responses.
Well, there you have it. Phew! Hope this information is useful to someone out there. If you're on Twitter or Instagram, I'd love to expand my PLN. Let's connect! Thanks for stopping by my blog. Hope you learned something new.
Have a great week!
